Mini Morsels for a Kid-Friendly Snack
(Family Features) Rally the family together to make and eat these bite-sized versions of corn dogs for an enjoyable, kid-friendly activity and snack. Parents will enjoy them, too, because they’re easy to make, easy to eat and clean up is a snap.
Mini Corn Dog Bites
Ingredients:
• Nonstick cooking spray
• 1 package all-beef bun-length hot dogs
• 1 cup flour
• 1 cup yellow cornmeal
• 2 tablespoons sugar
• 1 teaspoon salt
• 1/2 teaspoon baking powder
• 1 stick butter, melted
• 1 cup milk
• 1/4 cup sour cream
• 2 eggs
Dipping Sauce:
• 2/3 cup sour cream
• 3 tablespoons Dijon Mustard
• 2 tablespoons honey
Directions:
Heat oven 375°F.
Prepare muffin pan with nonstick cooking spray.
Cut each hot dog into six pieces.
In large bowl, whisk flour, cornmeal, sugar, salt and baking powder.
In medium bowl, whisk melted butter, milk, sour cream and eggs. Combine butter mixture with flour mixture.
Fill each muffin cavity halfway with batter. Place one hot dog piece in center of each cavity.
Bake 14-16 minutes. Cool completely.
To make dipping sauce: In small bowl, stir sour cream, mustard and honey. Serve with corn dogs.
Spicy Yet Savory Poppers
(Family Features) Your guests won’t be able to have just one of these sweet and savory poppers. With a touch of heat from the cayenne pepper, and sweetness from brown sugar, you’re almost sure to watch them quickly disappear.
Bacon-Wrapped Jalapeno Poppers
Recipe courtesy of Bob Evans
Prep time: 30 minutes
Cook time: 30 minutes
Serves: 40
Ingredients:
• 2 packages Bob Evans Thick Sliced Hardwood Smoked Bacon, slices cut in half
• 1 package Bob Evans White Cheddar Mashed Potatoes
• 1 package garlic herb cheese spread
• 20 jalapeno peppers, halved, seeded with membranes removed
• 1/4 cup brown sugar
• 1 teaspoon ground cayenne pepper
Directions:
Heat oven to 400° F. Set bacon out to thaw to room temperature so it is pliable.
In mixing bowl, use rubber spatula to combine mashed potatoes and garlic herb cheese. Stir until incorporated. Spread 1 teaspoon mashed potato mixture in each jalapeno half; level each with butter knife or spatula.
Wrap each jalapeno with bacon; use three half slices for large jalapenos or two halves for smaller sizes. Be sure bacon is wrapped sealing in mashed potato mixture tightly.
In small mixing bowl, combine brown sugar and cayenne pepper. Generously sprinkle over bacon and pat gently to make it stick.
Line cookie sheet with piece of parchment paper so sugar does not burn to pan. Bake until bacon reaches desired crispiness, around 25-35 minutes.
Let peppers cool slightly before serving, about 5 minutes.
A Comfort Food Favorite for Football Nights
(Family Features) With football season in full swing, it’s time to break out game day favorites that get the crowd on their feet. This Bison Barbecue Meatloaf may not be a traditional tailgate item, but it’s a perfect way to bring the family together for weeknight games.
Bison Barbecue Meatloaf
Recipe courtesy of “Cookin’ Savvy”
Servings: 4-6
Meatloaf:
• 1 pound ground bison
• 1/3 pound hamburger (optional)
• 2 tablespoons mesquite seasoning or barbecue seasoning
• 1 egg
• 1/2 cup barbecue sauce
Glaze:
• 1 cup barbecue sauce
• 2 tablespoons brown sugar
Directions:
Heat oven to 350 F.
In bowl, mix bison; hamburger, if using; seasoning; egg; and barbecue sauce. Place in loaf pan.
To make glaze, mix barbecue sauce and brown sugar. Spread over meatloaf.
Bake 45 minutes.
Simple, flavorful fall dessert
(Family Features) If your family’s taste buds have grown tired of apple-inspired fall desserts, simply look toward another quintessential autumn flavor: pumpkin. Quick and easy to prepare using a spice cake mix that provides all the flavor without the stress, this cake can be dressed to impress at a fall gathering or served after weeknight dinner.
Pumpkin spice bundt cake
Recipe courtesy of “Cookin’ Savvy”
Servings: 8-12
Bundt Cake:
• 1 box spice cake mix
• 1 can (15 ounces) pumpkin
• 1 stick butter, softened
• 2 eggs
Topping:
• 3 tablespoons caramel sauce
• 2cups powdered sugar
• 1/2 cup chopped nuts of choice
Directions:
Heat oven to 350 F. Grease Bundt pan.
In mixing bowl, mix cake mix, pumpkin, butter and eggs well then pour into Bundt pan.
Bake 45-50 minutes until toothpick inserted in middle comes out cleanly. Let cool in pan 5 minutes then remove from pan and let cool completely on rack.
Once cooled, mix caramel sauce and powdered sugar; drizzle over Bundt cake. Sprinkle with chopped nuts.
A go-to sweet potato side
(Family Features) Sweet potatoes seem to scream “fall,” especially this roasted version that pairs well with a wide variety of family favorites like fried chicken. It can be your go-to recipe when comfort cravings call for a savory (not sweet) side.
Roasted Sweet Potatoes
Recipe courtesy of “Cookin’ Savvy”
Servings: 4
Ingredients:
• 2 large sweet potatoes, washed and cubed
• 1/2 tablespoon garlic powder
• 1/2 tablespoon onion powder
• salt, to taste
• pepper, to taste
• oil, for drizzling
• 2 tablespoons butter
Directions:
Heat oven to 425 F.
In bowl, mix cubed sweet potatoes with garlic powder, onion powder and salt and pepper, to taste. Drizzle with oil; mix well.
Place sweet potatoes in baking dish and bake 30 minutes. Remove from oven and spoon butter over sweet potatoes, mixing well.
Note: If using small sweet potatoes, use four (one per serving).
A hearty Latino dish for a family fiesta
(Family Features) With a powerful influence across the United States, Latino food has become a regular feature of family dinners. Bring your family to the table for a true fiesta with this Mexican lasagna, a hearty solution that’s both filling and easy to make.
Mexican lasagna
Recipe courtesy of “Cookin’ Savvy”
Servings: 4-6
Ingredients:
• 1 pound ground beef
• 1 can (15 ounces) black beans
• 1 can (4 ounces) chiles
• 2 cans (14 ounces each) fire-roasted diced tomatoes, divided
• 1 can (15 ounces) whole kernel corn
• 1 tablespoon garlic powder
• 1 tablespoon onion powder
• 1 tablespoon taco seasoning
• 6 cups shredded cheese
• 18 taco-sized tortillas of choice
• fresh cilantro, for garnish
• sour cream, for serving
Directions:
Heat oven to 350 F.
In large skillet, brown ground beef; drain grease. Add black beans, chiles with juices, 1 can tomatoes with juices, drained corn, garlic powder, onion powder and taco seasoning.
Open remaining can of tomatoes; take out half and set aside. Add remaining half with juices to beef mixture. Mix well and turn off heat.
In 9-by-13-inch pan, line bottom with six tortillas, slightly overlapping. Cover with 1/3 of beef mixture and top with 2 cups shredded cheese. Repeat with remaining ingredients then top with reserved tomatoes.
Cover pan with foil and bake 30-40 minutes. Garnish with cilantro and serve with sour cream.
Serve with tofu on top of hot or cold salad and noodle meal kit.
Homemade meals to tackle takeout cravings
(Family Features) Many busy weeknights come down to one decision for frazzled families: cook at home or give in to takeout cravings. Instead of stressing over a decision, enjoy the best of both worlds and make Asian-inspired dishes from the comfort of your own kitchen.
For a quick and delicious solution that may just become a family go-to, these Teriyaki Tofu Bowls are jam-packed with flavor, noodles and fresh veggies.
These homemade favorites feature a delicious blend of broccoli, red and green cabbage, kale, shredded carrots, radish and green onions in Fresh Express’s Hot or Cold Teriyaki Salad and Noodle Meal Kit. The vegetable blend is tossed with pre-cooked Udon noodles, white sesame seeds and crunchy wontons then finished with a gourmet teriyaki dressing sauce for familiar Asian flavor.
Teriyaki Tofu Bowls
Prep time: 20 minutes
Cook time: 10 minutes
Servings: 4
Ingredients:
• 1 tablespoon rice wine vinegar
• 2 tablespoons dark soy sauce
• 1 tablespoon honey
• 1 teaspoon fresh grated ginger
• 1 tablespoon minced garlic
• 2 teaspoons white pepper
• 2 teaspoons Chinese five-spice
• 1/3 cup neutral oil
• 1 package (16 ounces) extra-firm tofu, cut into 1/2-inch pieces
• 1 bag (16.9 ounces) Fresh Express Teriyaki Hot or Cold Salad and Noodle Meal Kit
Directions:
In bowl, whisk vinegar, dark soy sauce, honey, ginger, garlic, white pepper and Chinese five-spice until combined.
Slowly pour oil into mixture while whisking vigorously. Place cut tofu in mixture and allow to sit 15 minutes.
Bring large saute pan to medium-high heat and place tofu in, turning when crust forms.
When tofu is finished, set aside and prepare hot or cold salad and noodle meal kit.
Serve with tofu on top of hot or cold salad and noodle meal kit.
Homemade meals to tackle takeout cravings
(Family Features) Many busy weeknights come down to one decision for frazzled families: cook at home or give in to takeout cravings. Instead of stressing over a decision, enjoy the best of both worlds and make Asian-inspired dishes from the comfort of your own kitchen.
Featuring a blend of chilled, freshly chopped vegetables; ready-to-eat, pre-cooked noodles; gourmet dressing sauce; and crispy toppings, Fresh Express Hot or Cold Salad and Noodle Meal Kits offer two meal options in every bag — hot or cold — so you can make your salad, your way. Available in Teriyaki, Asian Sweet Ginger and Korean Sesame flavors, they’re the perfect inspiration for making takeout-style dishes at home.
Consider this Marinated Teriyaki Steak with Teriyaki Noodle Salad recipe, which combines juicy steak with crisp vegetables and pre-cooked Udon noodles for the ultimate at-home comfort food in an effortless meal.
Marinated Teriyaki Steak with Teriyaki Noodle Salad
Prep time: 1 hour
Cook time: 24 minutes
Servings: 4
Ingredients:
• 1/2 cup dark soy sauce
• 1/2 cup brown sugar
• 1 tablespoon Sriracha sauce
• 1/2 cup unsalted chicken stock
• 1 pound flank steak
• 1 tablespoon sesame oil
• 1 bag (16.9 ounces) Fresh Express Hot or Cold Teriyaki Salad and Noodle Meal Kit
Directions:
In saucepan, add soy sauce, brown sugar, Sriracha sauce and chicken stock; bring to simmer while whisking. Simmer 4 minutes.
Cool mixture down until cool to touch, about 20 minutes.
Slice steak into thin strips and place in bowl. Pour marinade over steak and marinate for 1 hour.
In large pan over medium-high heat, stir-fry steak 2 minutes.
Remove steak from pan and allow to rest.
In same pan used for steak, add oil and cook hot or cold kit according to instructions on bag.
Add steak back to pan and stir to incorporate.
Garnish with toppings from hot or cold kit and serve.
Featuring a blend of chilled, freshly chopped vegetables; ready-to-eat, pre-cooked noodles; gourmet dressing sauce; and crispy toppings, Fresh Express Hot or Cold Salad and Noodle Meal Kits offer two meal options in every bag — hot or cold — so you can make your salad, your way. Available in Teriyaki, Asian Sweet Ginger and Korean Sesame flavors, they’re the perfect inspiration for making takeout-style dishes at home.
Consider this Marinated Teriyaki Steak with Teriyaki Noodle Salad recipe, which combines juicy steak with crisp vegetables and pre-cooked Udon noodles for the ultimate at-home comfort food in an effortless meal.
Marinated Teriyaki Steak with Teriyaki Noodle Salad
Prep time: 1 hour
Cook time: 24 minutes
Servings: 4
Ingredients:
• 1/2 cup dark soy sauce
• 1/2 cup brown sugar
• 1 tablespoon Sriracha sauce
• 1/2 cup unsalted chicken stock
• 1 pound flank steak
• 1 tablespoon sesame oil
• 1 bag (16.9 ounces) Fresh Express Hot or Cold Teriyaki Salad and Noodle Meal Kit
Directions:
In saucepan, add soy sauce, brown sugar, Sriracha sauce and chicken stock; bring to simmer while whisking. Simmer 4 minutes.
Cool mixture down until cool to touch, about 20 minutes.
Slice steak into thin strips and place in bowl. Pour marinade over steak and marinate for 1 hour.
In large pan over medium-high heat, stir-fry steak 2 minutes.
Remove steak from pan and allow to rest.
In same pan used for steak, add oil and cook hot or cold kit according to instructions on bag.
Add steak back to pan and stir to incorporate.
Garnish with toppings from hot or cold kit and serve.
Celebrate cozy season with a creamy, comforting meal
(Family Features) A comfy sweater, a crackling fire and a meal that warms you from the inside out are perfect ways to spend a cool autumn evening with the people you love.
Gather around the table for a hearty meal featuring some of the most comforting flavors of fall — pumpkin, apple and cinnamon — plus a special ingredient: pierogies. Found in the frozen food aisle, Mrs. T’s Pierogies are stuffed with creamy mashed potatoes, cheesy goodness and other big, bold flavors — a comforting addition to this creamy pumpkin soup with mini pierogies.
Available in 13 flavors, including 4 Cheese Medley, Loaded Baked Potato, Broccoli & Cheddar and other varieties in both full and mini sizes, they can be boiled, baked, sauteed, air fried and even grilled, making them a versatile addition to seasonal dishes of all kinds.
Creamy pumpkin soup with mini pierogies
Prep time: 5 minutes
Total time: 40 minutes
Servings: 4
Ingredients:
• 1 large shallot
• 1 large Honeycrisp apple (or 1 1/2 cups)
• 5 garlic cloves
olive oil
• 2 cups low-sodium chicken or vegetable broth, divided
• 2 cups canned pumpkin puree
• 2 teaspoons maple syrup
• pepper, to taste
• salt, to taste
• 1/4 teaspoon nutmeg
• 1/8 teaspoon cinnamon
• 2 tablespoons heavy cream
fresh thyme, to taste
• 1 box Mini 4 Cheese Medley Mrs. T’s Pierogies
Directions:
Slice shallot, peel and cube apple and crush garlic.
In pot over medium-low heat, add drizzle of olive oil and saute shallots, garlic and apple 20 minutes, covered.
Let mixture slightly cool then add to blender with 1/2 cup broth and blend until fully combined.
In pot, add pumpkin puree; blended shallot mixture; maple syrup; salt, to taste; pepper, to taste; nutmeg; cinnamon; remaining broth; heavy cream; and thyme, to taste. Bring to low boil then add frozen pierogies. Boil 3 minutes.
A comforting apple crumble
(Family Features) Don’t let hectic schedules and summer’s fade get you down; this warm apple crumble is perfect to put a smile on your loved ones’ faces. Visit Culinary.net for more comforting treats all year long.
Apple crumble
Recipe courtesy of “Cookin’ Savvy”
Servings: 4-6
Ingredients:
• 1 can (20 ounces) apple pie filling
• 1 box yellow cake mix
• 1/2 cup chopped pecans (optional)
• 1 1/2 butter sticks, melted
vanilla ice cream or whipped cream topping (optional)
Directions:
Heat oven to 375 F.
In baking dish, spread apple pie filling across bottom. Mix cake mix with pecans, if desired, then evenly cover apple pie filling.
Cover cake mix with melted butter. Do not mix. If butter pools in one spot, pick dish up and move from side to side until covered evenly.
Bake 30 minutes until crust is brown.
Serve with vanilla ice cream or whipped cream topping, if desired.
A grownup twist on a childhood favorite
(Family Features) When you’re looking for recipe inspiration, don’t be afraid to take things back to your childhood with a little home cooking. Even better, now you can enjoy those kid favorites as the main course (with an adult touch, to boot) in this baked broccoli mac.
It’s a warm, cozy solution that pairs with bread and a salad for dinner or can be halved and served as a side.
Baked Broccoli Mac
Recipe courtesy of “Cookin’ Savvy”
Servings: 4-6
Ingredients:
• 1 box (1 pound) pasta noodles, such as cellentani, elbow or penne
• 2 cups chopped broccoli
• 2 cups chicken broth
• 1 cup heavy whipping cream or half-and-half
• 2 cups mozzarella
• 1/2 block pasteurized cheese product, cubed

• 1 tablespoon garlic powder
• 1 tablespoon onion powder
• salt, to taste
• pepper, to taste
Topping ingredients:
• 2 cups breadcrumbs
• 1/2 stick butter
• 1/2 cup grated Parmesan cheese
Directions:
Heat oven to 350 F.
In large pot, cook pasta according to package instructions. Drain well then add broccoli, chicken broth, cream, mozzarella, pasteurized cheese product, garlic powder and onion powder. Season with salt and pepper, to taste. Mix well.
To make topping: In bowl, mix breadcrumbs, butter and Parmesan cheese.
Pour macaroni mixture into large baking dish then sprinkle with breadcrumb mixture. Bake 30 minutes.
An easy, cheesy spud sidedish
(Family Features) The main course at family dinners may be the main event, but that doesn’t mean you should have to settle for bland, boring sides. Fret not. There is a better way to pair favorite proteins with tasty potatoes.
Try these Parmesan potato wedges that are boiled before they’re baked for a moist middle and crispy exterior that’s perfect alongside favorite meals. Discover more delicious side dishes at Culinary.net.
Parmesan potato wedges
Recipe courtesy of “Cookin’ Savvy”
Ingredients:
• 5 golden potatoes
• 2 cups grated Parmesan cheese
• 1 tablespoon garlic powder
• 1 tablespoon onion powder
• salt, to taste
• pepper, to taste
• 1 cup oil, for drizzling
Directions:
Boil whole potatoes 20 minutes. Remove from water and slice into wedges.
Heat oven to 375 F.
In medium bowl, mix Parmesan cheese, garlic powder and onion powder. Add salt and pepper, to taste.
Dip wedges in Parmesan mixture, covering potatoes well. Place on cookie sheet drizzled in oil then drizzle oil on wedges. Bake 15 minutes then turn wedges over and bake 15 minutes.
A quick and healthy breakfast for hectic mornings
(Family Features) Enjoy this recipe that helps you get the kids up and out the door on those busy school mornings when nothing seems to run smoothly. While breakfast is widely recognized as the most important meal of the day, that doesn’t always mean you have time to sit down and enjoy it.
Solving your morning rush with grab-and-go breakfasts you can make ahead of time accomplishes both goals at once: staying on schedule and fueling your kiddos (and yourself) for the day ahead. These delicious and nutritious recipes come from Healthy Family Project’s 2024 Back to School Campaign, which is raising $12,000 for the Foundation for Fresh Produce to support children’s accessibility to fresh fruits and vegetables.
These Mixed Berry Whole-Wheat Muffins are a perfect solution when you need to hustle out the door. As a healthy, delicious treat kids can take with them to school or eat during the commute, they’re quick and easy to make. Loaded with blueberries — a bona fide superfood that’s high in fiber, low in calories and high in vitamin C, potassium and vitamin K — you may even need to make a double batch so you have plenty for breakfasts and after-school snacks.
Mixed Berry Whole-Wheat Muffins
Recipe courtesy of Healthy Family Project
Prep time: 5 minutes
Cook time: 15 minutes
Servings: 12
Ingredients:
• 1 1/4 cups white whole-wheat flour
• 1 teaspoon baking powder
• 1 teaspoon baking soda
• 1/8 teaspoon salt
• 1 large egg
• 1/2 cup maple syrup
• 2 teaspoons vanilla extract
• 3/4 cup plain nonfat Greek yogurt
• 3/4 cup unsweetened applesauce
• 1/2 cup chopped strawberries
• 1/2 cup blueberries
Directions:
Preheat oven to 400 F. Grease muffin pan and set aside.
In medium bowl, whisk flour, baking powder, baking soda and salt. In separate large bowl, mix egg, maple syrup, vanilla, yogurt and applesauce.
Add dry ingredients to wet ingredients and stir until just combined. Do not overmix. Fold in strawberries and blueberries.
Pour batter into prepared muffin tin, filling cups about 3/4 full.
Bake 15 minutes, or until tops are golden brown and toothpick inserted in center comes out clean.
Remove from oven and let cool in muffin tin 5 minutes before removing.
A healthy beverage for your morning routine
(Family Features) Begin building tiny, healthier practices into routines you already have to help make it easier to establish habits you can stick to. This concept is called “habit stacking,” and it can help you improve habits from morning to night.
Consider those busy mornings when you need an on-the-go solution. Rather than opting for sugary foods and drinks, turn to Green Tea Berry Banana Smoothies that include unsweetened green tea. When incorporated as part of an overall healthy diet, unsweetened tea can support heart health.
This no-sugar-added recipe from Lipton, a proud national sponsor of the American Heart Association’s Life is Why campaign, can help you enjoy healthier mornings while checking emails or hydrating before heading to the office.
Green Tea Berry Banana Smoothies
Recipe courtesy of the American Heart Association
Servings: 4 (1 1/2 cups per serving)
Ingredients:
• 3 cups water
• 8 single-serving green tea bags
• 16 ounces frozen mixed berries (about 3 cups)
• 2 medium bananas, peeled, cut in half and frozen
• 1 cup fat-free plain Greek yogurt
• 2 teaspoons fresh-grated peeled gingerroot (optional)
• 2 teaspoons vanilla extract (optional)
• 2 teaspoons chia or flax seeds (optional)
Directions:
In small saucepan over high heat, bring water to boil. Remove pan from heat. Submerge tea bags. Steep 4 minutes. Discard tea bags. Let tea mixture cool 30 minutes. Pour into pitcher. Refrigerate 2 hours, or until chilled.
In food processor or blender, process tea, berries, bananas and yogurt until smooth. Add gingerroot and vanilla, if desired, and process until smooth. Pour into four glasses. Sprinkle with chia seeds, if desired.
Nutritional information per serving (without optional ingredients): 136 calories; 1 g total fat (0 g saturated fat, trans fat, polyunsaturated fat and monounsaturated fat); 3 mg cholesterol; 23 mg sodium; 29 g carbohydrates; 5 g fiber; 18 g total sugars (0 g added sugars); 8 g protein.
A better-for-you beverage for a healthy heart
(Family Features) How you start your morning can impact the rest of your day. If you’re looking to incorporate healthier choices into your morning routine, try a concept known as “habit stacking.” Building tiny, healthier habits into routines you already have, like enjoying a morning beverage or breakfast before you check your email instead of jumping right into the day’s tasks, can make it easier to stick to a new habit when it’s built into an existing routine.
If you already enjoy the routine of breakfast to start the day, consider swapping sugary drinks for beverages without added sugars like unsweetened green or black tea. When incorporated as part of an overall healthy diet, unsweetened tea can help support heart health.
If you need help getting started, Lipton, a proud national sponsor of the American Heart Association’s Life is Why campaign, created this easy-to-make, better-for-you tea recipe.
For a little morning refreshment, simple Sparkling Green Tea Cranberry Spritzers offer a solution with 0 grams of added sugars.
Sparkling Green Tea Cranberry Spritzers
Recipe courtesy of the American Heart Association
Servings: 4 (1 1/2 cups per serving)
Ingredients:
• 4 cups water
4 single-serving green tea bags
1 cup 100% cranberry juice or 100% cranberry-pomegranate juice
2 cups ice cubes
1/2 cup seltzer (flavored or plain) or low-sodium club soda, chilled
4 orange slices or lime wedges (optional)
Directions:
In small saucepan over high heat, bring water to boil. Remove pan from heat. Submerge tea bags. Steep 4 minutes. Discard tea bags. Let tea mixture cool 30 minutes. Pour into pitcher. Stir in cranberry juice. Refrigerate 2 hours, or until chilled.
At serving time, put ice cubes in four glasses. Pour tea mixture into glasses. Top each serving with seltzer. Garnish with orange slices.
Tip: To create cranberry-flavored ice cubes, fill ice cube tray with 100% cranberry juice and freeze.
Nutritional information per serving: 32 calories: 0 g total fat (0 g saturated fat, trans fat, polyunsaturated fat and monounsaturated fat); 0 mg cholesterol; 4 mg sodium; 8 mg carbohydrates; 0 g fiber; 8 g total sugars (0 g added sugars); 1 g protein.
A grilled side dish for your next cookout
(Family Features) Grilling is a great way to feed a crowd, but that doesn’t have to be limited to just the main dish. Fresh veggies like asparagus are a perfect accompaniment to grilled favorites and can be placed on the grates right next to the protein you’re serving to make hosting a cinch and avoid heating up the kitchen. Before your next gathering, visit Culinary.net for more recipe inspiration.
Grilled asparagus
Recipe courtesy of “Cookin’ Savvy”
Prep time: 5 minutes
Cook time: 15 minutes
Ingredients:
• 1 bundle fresh asparagus
• 1 package (3-4 ounces) prosciutto
• 2 teaspoons garlic powder
• 2 teaspoons onion powder
• 1 teaspoon pepper
• 3 tablespoons butter
Directions:
Preheat grill to medium heat.
Wash and cut asparagus spears to equal sizes.
Wrap four asparagus spears with prosciutto. Repeat until all asparagus and prosciutto are used, about six bundles. Place in cast-iron skillet or disposable aluminum pan. Cover bundles with garlic powder, onion powder, pepper and butter.
Place skillet or pan on grill. Grill 15 minutes, turning bundles halfway through cooking.
Bring a chill to summer with cool, creamy cheesecake
(Family Features) When it’s hot but you crave something sweet, turn to a delicious dessert that’s cool and creamy. French Style Cheesecake with Vanilla Wafer Crust offers the best of both worlds as a fresh, no-bake, refrigerated favorite you can top with chocolate, fruit or vanilla wafer crumbs.
French Style Cheesecake with Vanilla Wafer Crust
Recipe courtesy of “Cookin’ Savvy”
Total time: 25 minutes, plus 3 hours refrigeration
Servings: 8
Crust:
•2 cups vanilla wafers, crushed
•1 stick butter, melted
•1/4 cup brown sugar
Whipped Cream:
•1 cup heavy cream
•3 tablespoons sugar
•1 teaspoon vanilla
Cheesecake:
•8 ounces cream cheese, softened
•1 teaspoon vanilla
•1/2 cup powdered sugar
Directions:
To make crust: Mix crushed vanilla wafers, melted butter and sugar; press into pie pan or individual pudding cups.
To make whipped cream: In large bowl, using electric mixer, mix heavy cream, sugar and vanilla until thickened into whipped cream.
To make cheesecake: Add softened cream cheese, vanilla and powdered sugar to whipped cream bowl. Using electric mixer, mix until smooth. Pour over vanilla wafer crust and chill 3 hours.
Quench your summer cravings with bold, refreshing beverages
(Family Features) In between summer adventures and hot afternoons spent poolside, you’re likely looking to combat rising temperatures with a cool, refreshing beverage. This year, quench your thirst with drinks that play up the trendiness of bold flavors.
While many concoctions can help you beat the heat, some gems seem to hit the spot better than others. Consider one of the trendiest beverages that is increasingly becoming available at smoothie and juice bars nationwide but which you can also prepare at home: the tempting, bold taste of the Mangonada. With a harmonious fusion of sweet, spicy and tangy flavors, this thirst-quencher captures the essence of tropical indulgence with the majestic mango at the center of its symphony of flavors.
“Mango not only adds a burst of flavor but also brings a unique depth to the beverage,” said Dan Spellman, director of marketing for the National Mango Board.
Central to the Mangonada is Tajín Fruity Chamoy Sauce and Clásico Seasoning — a zesty blend of chili peppers, lime and sea salt — which are must-have ingredients to make the beverage. They combine to infuse the drink with a subtle kick, balancing the mango’s sweetness with a hint of spiciness that hits different.
Mangonada
Recipe courtesy of the National Mango Board
Ingredients:
• 1 cup fresh mango cubes, plus 5-6 cubes for garnish, divided
• 2 ounces fresh mango nectar
• 1/2 ounce lime juice
• 2 cups ice
• 1/2 ounce agave nectar
• 2 tablespoons Tajín Fruity Chamoy Hot Sauce, plus 2 ounces for garnish, divided
• 1 tablespoon Tajín Clásico Seasoning, for garnish
• 1 tamarind candy, for garnish (optional)
Directions:
Measure 1 cup mango cubes, mango nectar, lime juice, ice and agave nectar into blender cup. Blend until smooth.
In separate small dishes, add 1 ounce hot sauce and 1 ounce seasoning.
Dip rim of 14-ounce Collins glass into hot sauce then seasoning to coat. Drizzle remaining hot sauce along inside of glass.
In glass, pour 1 tablespoon chamoy sauce followed by blended Mangonada. Top with remaining fresh mango cubes and sprinkle with additional seasoning. Add tamarind candy to glass, if desired.
Caesar salad-inspired tacos
(Family Features) From putting a family meal on the table after activities to hosting a large crowd at your next get-together, a seasonal favorite like Caesar salad can serve as the perfect canvas for creating quick, easy-to-prepare meals.
With more than 100 varieties of fresh, healthy and convenient ready-to-eat salads – including 11 Caesar salad varieties like the Caesar Chopped Salad Kit – Fresh Express provides tasty, versatile salad kits that can be modified to fit nearly any kind of meal you might be craving.
Available in the refrigerated produce department, these premium mixes can be eaten as a standalone salad when time is of the essence or taken beyond the bowl and fused with another beloved classic, like tacos, for a burst of flavor and texture in every bite. These Fried Chicken Caesar Tacos, ready in just 30 minutes, feature savory Caesar salad – crisp, chopped romaine; herb-seasoned crouton crumbles; cracked pepper; grated Parmesan cheese; and a delicious Parmesan Caesar dressing — enveloped in a crispy, golden chicken shell.
Chicken caesar tacos
Prep time: 10 minutes
Cook time: 20 minutes
Servings: 4
Ingredients:
• 3 eggs
• 3 cups all-purpose flour
• 1 packet taco seasoning
• 2 chicken breasts, sliced in half horizontally
• 3 cups neutral oil
• 1 bag (9.4 ounces) Fresh Express Caesar Chopped Salad Kit
Directions:
In shallow bowl, beat eggs. In separate bowl, combine flour and half packet of taco seasoning.
Place chicken in resealable bag and, using meat tenderizer, pound to 1/4-inch thickness.
In medium saute pan, heat oil over medium heat.
Season chicken breasts with remaining taco seasoning.
Coat chicken in flour mixture, dip into beaten eggs then coat chicken in flour mixture again, pressing firmly to adhere.
In pan with hot oil, cook battered chicken until golden brown, flipping halfway through, until chicken reaches minimum internal temperature of 165 F, 4-5 minutes per side (depending on thickness). Fry in batches to avoid overcrowding pan, if necessary.
Once fully cooked, fold chicken over to create taco shell shape. Place sheet pan on top to hold shape, 3-4 minutes.
In large bowl, combine lettuce, dressing, croutons and cheese from salad kit.
Once chicken taco shells set, carefully remove sheet pan. Fill each taco shell with prepared salad mixture.
To build sandwiches, place sliced pork on bottom halves of toasted buns. Top with prepared salad mixture and sauteed onions. Finish with top halves of buns.
Celebrate Salad Season Outside the Bowl
(Family Features) From putting a family meal on the table after activities to hosting a large crowd at your next get-together, a seasonal favorite like Caesar salad can serve as the perfect canvas for creating quick, easy-to-prepare meals.
Even when time is limited, flavor doesn’t need to be compromised. Inspired by high-end dining experiences, the Fresh Express Twisted Creamy Truffle Caesar Chopped Salad Kit provides a gourmet twist to turn these Creamy Truffle Caesar Pork Sandwiches into a culinary delight. Ready is just 20 minutes and featuring tender pork strips; a Caesar salad mix of garden-fresh crispy romaine lettuce, delicate sprinkles of truffle Parmesan cheese, crunchy garlic brioche croutons and creamy dressing; and sauteed onions on a toasted bun, every bite is a sensation to be savored.
Creamy Truffle Caesar Pork Sandwiches
Prep time: 5 minutes
Cook time: 15 minutes
Servings: 4
Ingredients:
• 2 pounds boneless skinless pork chops
• 4 tablespoons Italian seasoning
• 2 tablespoons canola oil
• 1 red onion
• 1 bag (9.3 ounces) Fresh Express Twisted Caesar Creamy Truffle Caesar Chopped Salad Kit
• 4 long sandwich rolls
Directions:
Preheat pan on stove over medium-high heat. Season pork chops with Italian seasoning.
When pan is hot, add oil and pork chops. Cook pork chops, turning halfway through, until they reach minimum internal temperature of 145 F, 6-8 minutes per side (depending on thickness).
Once pork chops are cooked through, remove from pan and let rest a few minutes.
Peel and slice onion. After resting, slice pork into strips; set aside.
In same pan, saute onion until translucent, about 5 minutes. Set aside.
In large bowl, combine lettuce, dressing, croutons and cheese from salad kit.
In separate pan, toast buns until golden brown; set aside.
To build sandwiches, place sliced pork on bottom halves of toasted buns. Top with prepared salad mixture and sauteed onions. Finish with top halves of buns.
Peanut butter cups add a ‘pop’ to Independence Day festivities
(Family Features) Break out the red, white and blue and (safely) set off your favorite fireworks – it’s time to honor America’s birthday. Along with all the booms and blasts, make sure your crowd is satisfied with one of the country’s most beloved snack foods and a true firecracker in the kitchen: popcorn.
Celebrated for its seed-to-snack simplicity, popcorn’s smell, taste and versatility mean it can enhance any occasion as a budget-friendly solution for family gatherings. As a timeless treat nationwide, it is an especially perfect partner for Fourth of July get-togethers as it bursts while cooking and brings a thrill to the senses.
These Peanut Butter Cups are an ideal summer snack that’s easy to prepare with everyday ingredients. All you need to do is melt together peanut butter, butter and marshmallows then mix in popcorn, shredded wheat, peanuts and raisins. Bake in individual paper liners for grab-and-go convenience then share with your nearest and dearest. For added flair, use American flag-themed liners or finish your creation with toothpicks connected to miniature American flags.
Peanut Butter Cups
Yield: 24 cups
Ingredients:
• 1/2 cup peanut butter
• 1/2 cup butter or margarine
• 1 package (10 1/2 ounces) miniature marshmallows
• 6 cups freshly popped popcorn
• 6 cups spoon-size shredded wheat
• 1 cup dry roasted peanuts
• 1 cup raisins
Directions:
Preheat oven to 250 F.
In microwave on high heat using large, microwavable bowl, melt peanut butter and butter 1 minute.
Add marshmallows and microwave on high 1 minute, or until marshmallows puff; stir.
Add popcorn, shredded wheat, peanuts and raisins; stir gently.
Place paper liners in two 12-cup muffin pans. Divide mixture into 24 cups.
Bake 10 minutes.
Remove from oven and store “cups” in airtight container.
Add a Patriotic ‘Pop’ to Fourth of July Parties
(Family Features) Break out the red, white and blue and (safely) set off your favorite fireworks — it’s time to honor America’s birthday. Along with all the booms and blasts, make sure your crowd is satisfied with one of the country’s most beloved snack foods and a true firecracker in the kitchen: popcorn.
Celebrated for its seed-to-snack simplicity, popcorn’s smell, taste and versatility mean it can enhance any occasion as a budget-friendly solution for family gatherings. As a timeless treat nationwide, it’s an especially perfect partner for Fourth of July get-togethers as it bursts while cooking and brings a thrill to the senses.
Add a touch of heat to this year’s celebrations with Cinnamon Candy Poppers that bring a real bang to the snack table. Inspired by those classic firecrackers that a Fourth of July party can’t do without, these balls of ooey-gooey goodness provide a truly patriotic spark.
Cinnamon Candy Poppers
Yield: 24 balls
Ingredients:
• Nonstick cooking spray
• 3 quarts popped popcorn
• 4 tablespoons (1/2 stick) butter or margarine
• 3 cups miniature marshmallows
• 1/2 cup cinnamon-flavored candies
• red and blue confection stars
• red licorice string
Directions:
Spread large sheet of plastic wrap on work surface and spray with nonstick cooking spray.
Spray large mixing bowl lightly with nonstick cooking spray and place popcorn inside.
In medium saucepan over low heat, melt butter. Stir in marshmallows until melted and mixture is smooth. Pour over popcorn. Add cinnamon candies and mix well until coated.
Spray hands with nonstick cooking spray and form mixture into 24 balls. Gently press red and blue stars onto each ball. Place piece of licorice string on top of each ball.
Cap the night with a brown sugar delight
(Family Features) These Brown Sugar Meringues provide bursting summertime flavor in a little, handheld bite. They’re ideal for sharing with loved ones after a weekend barbecue or birthday celebration and, with just a few ingredients, they’re as easy to make as they are to enjoy.
To help bake this delicious dessert, you can trust Domino to deliver quality, consistency and results that only a century of experience can bring. Its Light Brown Sugar offers a buttery, caramel flavor, making it a perfect choice for sweets of all kinds.
Brown Sugar Meringues
Prep time: 20 minutes
Cook time: 1 hour, plus 1 hour rest time
Yield: 3 dozen meringues
Ingredients:
• Water
• 6 large egg whites, at room temperature
• 1 cup Domino Light Brown Sugar
• 3/4 cup Domino Granulated Sugar Easy Baking Tub
• 1⁄8 teaspoon salt
• 2 tablespoons Domino Turbinado Sugar (optional)
Directions:
Preheat oven to 225 F. Line three baking sheets with parchment paper. Set aside.
Pour 1 inch of water into medium saucepan and heat it until simmering. In heat-proof bowl, mix egg whites, brown sugar, granulated sugar and salt. Put bowl on top of saucepan and warm mixture until it reaches 125 F. Stir continuously and make sure mixture does not touch water.
Carefully remove from heat. Using electric mixer, beat mixture at high speed 8-10 minutes. Transfer meringue into piping bag fitted with star tip. Pipe 12 meringues per baking sheet.
Sprinkle turbinado sugar on top of meringues, if desired. Bake 1 hour. Turn off oven and allow meringues to rest inside oven 1 hour. Remove from oven and enjoy.
A simple, skewered side
(Family Features) Keep your summer meals simple by leaning into versatile ingredients that can help you whip up a variety of side dishes.
These grilled red potato skewers display the delicious, nutritious, versatile qualities of Wisconsin potatoes. With a multitude of varieties, they’re a favorite among world-class chefs, home cooks, large and small supermarkets and even the pickiest of eaters.
It can be love at first bite with these 100% gluten-free potatoes that can add a touch of nutrition to summer cookouts. They’re a good source of vitamin B6, high in vitamin C, rich in potassium and an excellent source of fiber.
Grilled Red Potato Skewers
Recipe courtesy of the Wisconsin Potato & Vegetable Growers Association
Prep time: 10 minutes
Cook time: 20 minutes
Servings: 4
Ingredients:
• 2 medium russet or Yukon gold Wisconsin potatoes or 6 red Wisconsin potatoes
• 2 medium zucchini
• 1/2 smoked sausage rope
• 4 skewers (12 inches each)
• 1/2 cup Italian dressing
Directions:
Preheat grill to medium heat. Cut potatoes in half. Cut zucchini and sausage same width as potatoes. Skewer potatoes, zucchini and sausage. Repeat for each skewer.
Place skewers in dish and cover with Italian dressing. Marinate 5 minutes.
Place skewers on grill and cook 5 minutes on each side, or until potatoes are done. Remove from grill and serve.
Serve up a summertime spread
(Family Features) Bright colors and fresh flavor bring out the best in summer meals, starting with seasonal salads that look as though the ingredients were just picked from a garden.
Orange, grapefruit and avocado are perfect accompaniments in this citrus spring mix salad when paired with Fresh Express Spring Mix. This garden-fresh blend combines carefully selected tender baby butter and red and green leaf lettuces with baby greens including spinach, arugula and kale that are picked when the tiny leaves are perfect and whole.
With more than 100 varieties of fresh, healthy and convenient ready-to-eat salads, as well as an assortment of salad greens you can use to create your ideal summer dishes, the kits and lettuce blends are available in the refrigerated product department of your favorite grocery store.
Citrus Spring Mix Salad
Prep time: 5 minutes
Total time: 10 minutes
Servings: 2
Dressing:
• 1/4 cup orange juice
• 1 teaspoon grated orange zest
• 1 teaspoon white wine vinegar
• 1/4 teaspoon Dijon mustard
• 1/2 teaspoon sugar
• 1/8 teaspoon salt
xxx
Salad:
• 1 package (5 ounces) Fresh Express Spring Mix
• 1 navel orange, peeled and sectioned
• 1 red grapefruit, peeled and sectioned
• 1 avocado, peeled, pitted and sliced
• 1/4 cup red onion, thinly sliced
To make dressing:
In small bowl, whisk orange juice, orange zest, white wine vinegar, Dijon mustard, sugar and salt. Set aside.
To make salad:
In large bowl, toss spring mix with salad dressing. Divide salad evenly among two plates. Top with oranges, grapefruit, avocado and onion.
Take Family Favorites Al Fresco
(Family Features) Bright sunshine, warm patios and fresh foods go hand in hand. As warm weather and sunny days call you outdoors, bring the whole family along with favorite meals that blend perfectly with a soft breeze and the subtle sounds of nature.
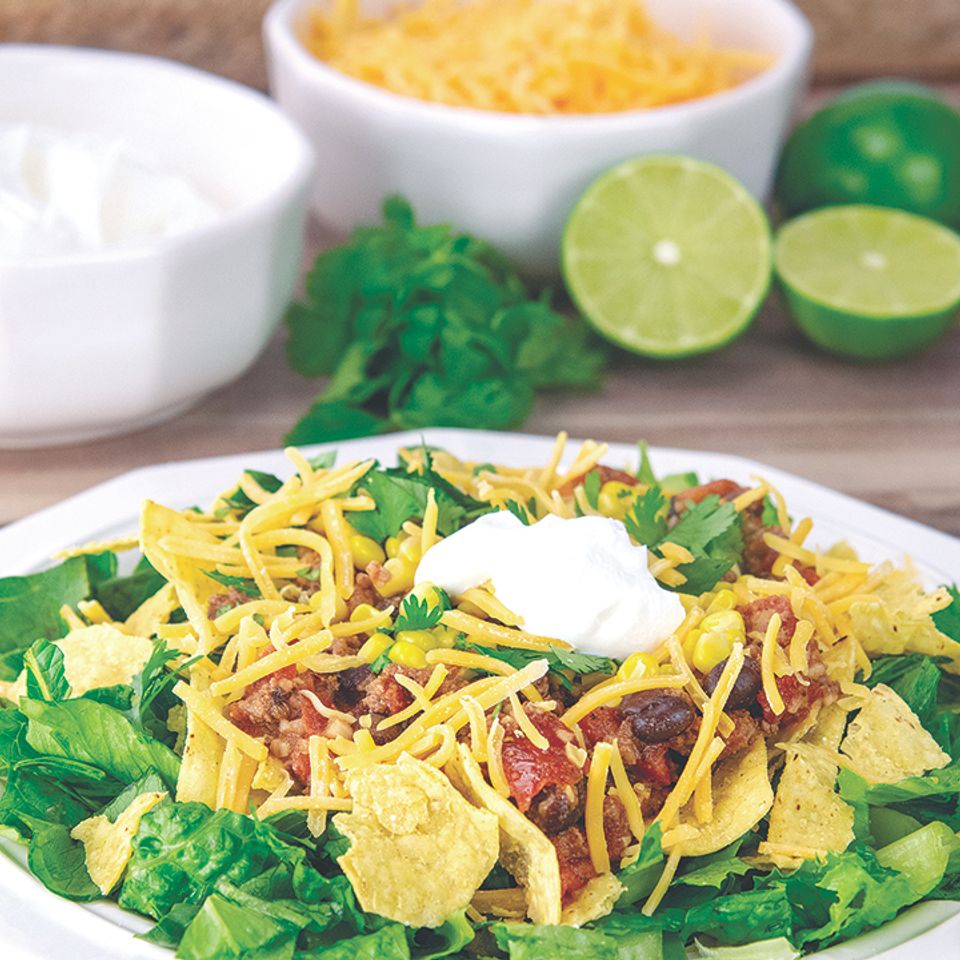
Salad season means fresh ingredients from lettuce and veggies to favorite toppings and beyond. Add a crisp bite to your next al fresco occasion with this Southwest Ranch Taco Salad featuring Newman’s Own’s Southwest Ranch Dressing. The dressing is creamy and smoky with a kick of spice and features no artificial flavors, no colors from artificial sources and no MSG, making it a perfect companion for salads and dips. In fact, you can enjoy this seasonal salad even more knowing that 100% of profits from the sale of the dressing goes toward helping nourish and transform the lives of children facing adversity.
Southwest Ranch Taco Salad
• 1/2 head romaine lettuce
• 1 pint cherry tomatoes
• 2 small avocados
• 1 tablespoon extra-virgin olive oil
• 1 pound ground beef (80/20 ground chuck)
• 2teaspoons Newman’s Own Mild Taco Seasoning
• 1/4 cup water
• 1 can (15 1/2 ounces) black beans
• 1 1/2 cups canned corn
• 1 cup shredded sharp cheddar cheese
• 2 tablespoons chopped fresh cilantro, plus additional for serving (optional), divided
• 1 cup Newman’s Own Southwest Ranch Dressing
• 6 ounces tortilla chips
Directions
Coarsely chop lettuce, halve cherry tomatoes and pit, peel and slice avocados. Set aside.
In large frying pan over medium-high heat, heat olive oil. Brown ground beef, stirring occasionally, 4-5 minutes. Add taco seasoning and water; cook according to package directions, 5-8 minutes, or until meat is thoroughly cooked.
Drain and rinse black beans. Set aside.
Divide lettuce among serving bowls or plates. Top with ground beef, tomatoes, avocados, black beans, corn, cheese and 2 tablespoons cilantro. Tuck in tortilla chips.
Drizzle with southwest ranch dressing and sprinkle with additional cilantro, if desired.
Show off your kitchen skills
(Family Features) There’s perhaps no better way to show off your kitchen skills than by working up a batch of Apple Ricotta Crepes, which require a soft touch to cook the light, silky batter to golden perfection. This rendition of the beloved thin pancakes calls for a ricotta spread and apple-cinnamon topping for a delightful pairing of savory and sweet.
Special occasions with those you love can be uplifted with the aroma and flavor Envy Apples that offer an invitation to savor small moments around the table. Available at Whole Foods and other major grocery stores, the craveable texture and crunch of this leading apple variety provides balanced sweetness as the ultimate apple experience for family gatherings. Along with their delicious flavor, the flesh remains whiter longer, even after cutting, slicing, dicing or cubing, so that homemade meals look as good as they taste.
Apple Ricotta Crepes
Crepes:
• 1 cup flour
• 1 tablespoon sugar
• 1/2 teaspoon salt
• 1cup whole milk
• 2 eggs
• 1 teaspoon vanilla
• butter, for cooking
Apple Topping:
• butter
• 2 tablespoons brown sugar
• Envy Apples, sliced or cubed
• 1/2 teaspoon cinnamon
• 1/8 teaspoon nutmeg
• salt, to taste
• maple syrup
Ricotta Filling:
• 1 cup ricotta cheese
• 1 lemon, zest and juice only
• 2-3 tablespoons sugar, or to taste
Directions
To make crepes: In bowl, combine flour, sugar and salt. Add milk, eggs and vanilla then, using whisk, combine thoroughly. Mixture should be silky smooth. Refrigerate.
To make apple topping: In pan over medium heat, heat butter and brown sugar until bubbly and golden.
Add apples, cinnamon, nutmeg and salt, to taste; cook over medium-low heat until apples are soft. Turn off heat and finish with maple syrup.
To make ricotta filling: Combine ricotta, lemon zest, lemon juice and sugar, mix well and set aside.
In nonstick pan over medium-low heat, melt small amount of butter.
Add one ladle crepe batter, cook until bubbles form, flip and cook until golden. Repeat with remaining batter. Stack crepes to keep warm and soft.
Spread ricotta
Using 1/3 measuring cup, spoon frittata mixture into oven-safe large skillet or 9-by-9-inch pan.
Bake 25-30 minutes, or until eggs are set.
Let cool slightly then serve.
Make mom’s day with a craveable brunch
(Family Features) There’s perhaps no better occasion to show off your kitchen skills than Mother’s Day, a perfect opportunity to turn the tables on mom and let her relax while you handle cooking duties. A homemade breakfast — or better yet, letting her sleep in for brunch — is a sure way to win her over and show how much you care.
If a full Mother’s Day celebration is on the menu, try this hearty dish. A frittata provides the best of both worlds, as it’s a filling meal that’s also easy to make — just let the oven do the work. This Apple, Tomato and Goat Cheese Frittata is no exception as it calls for a handful of everyday ingredients you can whisk together in a cinch. While it’s in the oven (about 30 minutes, give or take) you can put the finishing touches on your last-minute decorations and handwritten cards.
Apple, Tomato and Goat Cheese Frittata
Ingredients:
• 6 eggs
• 1 teaspoon hot pepper sauce
• 2 teaspoons kosher salt
• 20 turns fresh cracked pepper
• 1/4 cup whole milk
• 1 Envy Apple, small diced
• 1/2 cup sundried tomatoes, chopped
• 4 ounces goat cheese, crumbled
• 2 tablespoons thinly sliced chives
Directions
Preheat oven to 350 F.
In large mixing bowl, whisk eggs, hot pepper sauce, salt, pepper and milk until well combined.
Stir in apples, tomatoes, goat cheese and chives until well combined.
Using 1/3 measuring cup, spoon frittata mixture into oven-safe large skillet or 9-by-9-inch pan.
Bake 25-30 minutes, or until eggs are set.
Let cool slightly then serve.
Sweet solutions to celebrate Cinco de Mayo
(Family Features) From fajitas and tacos to everything in between, fueling your Cinco de Mayo fiesta starts with delicious food that brings everyone to the table. Traditional dishes and new twists on classics can be equally satisfying whether you’re feeding your nearest and dearest or hosting the entire neighborhood.
Start with these vegan apple and black bean fajitas for a plant-forward spin on a popular dish that features sauteed apples, peppers, zucchini, jicama, onion and jalapeno. The craveable texture and crunch of Envy Apples – a leading apple variety available at Whole Foods and other major grocery stores – shine both in the mixture of sauteed produce and sliced raw into sticks for a crunchy finish with added sweetness. Plus, their flesh remains whiter longer, even after slicing, so this dish looks as good as it tastes.
Vegan Apple and Black Bean Fajitas
Ingredients:
• 1 bell pepper, sliced, seeds removed
• 1 zucchini, sliced
• 1 small jicama, sliced
• 3 Envy Apples, sliced
• 1 yellow onion, sliced
• 1 jalapeno, sliced, seeds removed
• 1 teaspoon garlic
• 1teaspoon ground cumin
• 2 sprigs fresh oregano
• 1 teaspoon chili pepper (optional)
• salt, to taste (optional)
• pepper, to taste (optional)
• 1 cup cooked black beans
• 1 lime
• 3 sprigs fresh cilantro
• 4 small flour tortillas
Directions
In skillet over high heat, saute bell pepper, zucchini, jicama and half the apple slices. Set aside.
In same hot skillet, saute onions, jalapenos and garlic until lightly caramelized. Combine with sauteed apple mixture. Season with cumin and oregano. Add chili powder and salt and pepper, to taste, if desired.
Add cooked black beans to saute mixture. Top with squeeze of lime. Garnish with cilantro and remaining raw apple slices.
Serve with tortillas.
Unite loved ones with a luscious dessert
(Family Features) Celebration-worthy treats are perfect ways to cap off days spent with those you love, whether there’s a special occasion or you’re simply looking for creative ways to share more moments together. As a beloved staple in American households for generations, pie provides a sweet, delicious way to bring family and friends to the table.
Tart Cherry Unity Pie
Recipe courtesy of the U.S. Tart Cherry Industry
Prep time: 20 minutes
Cook time: 55 minutes
Servings: 8
Pie:
• 1 pie crust (9 inches)
• 2 cups canned tart cherry pie filling
• 2 cups canned apple pie filling
• 1 egg, beaten (for egg wash)
Streusel:
• 1/2 cup all-purpose flour
• 1/4 cup brown sugar
• 2 tablespoons granulated sugar
• 1/3 cup pecans, roughly chopped
• 1 pinch salt
• 4 tablespoons butter, melted
Pumpkin Spice Whipped Cream:
• 1 cup heavy cream
• 2 tablespoons powdered sugar
• 1/2 teaspoon pumpkin spice
Directions
Preheat oven to 400 F.
Fit pie crust to 9-inch pie dish. Crimp edges and use fork to poke holes in bottom. Place pie crust in freezer to chill.
In large bowl, combine tart cherry pie filling and apple pie filling. Set aside.
To make streusel: In bowl, use fork to mix flour, brown sugar, granulated sugar, pecans and salt. Pour butter over dry ingredients and mix until ingredients come together in clumps.
To assemble pie: Pour cherry-apple filling into prepared pie crust and sprinkle streusel on top. Brush beaten egg onto exposed pie crust edges.
Bake 25 minutes. At 10-minute mark, cover pie dish with foil to prevent crust from over-browning. After 25 minutes, lower oven temperature to 375 F and bake 30 minutes.
To make pumpkin spice whipped cream: In large bowl or bowl of stand mixer, add heavy cream, powdered sugar and pumpkin spice. Use hand mixer or beater attachment on stand mixer to beat on medium-high speed 3-5 minutes until stiff peaks form. Refrigerate whipped cream until ready to serve.
Let pie cool 2-3 hours then dollop pumpkin spice whipped cream on top, slice and serve.
Substitution: Storebought whipped cream topped with pumpkin spice can be used in place of homemade pumpkin spice whipped cream.
Make Mom’s day extra special
(Family Features) Don’t let Mother’s Day pass by as just another day on the calendar. Make this year’s celebration a true ode to the moms in your life with some extra special touches at breakfast and beyond.
Give Her the Day Off: Whether she’s the culinary expert of the home or cooking is usually a team effort, make sure her morning is one of rest and relaxation while you handle kitchen duties from prep to cleanup. These Bacon-Wrapped Egg Muffins are easily customizable to suit your family’s favorite tastes with nearly endless possibilities. Just make sure to place a foil-lined cookie sheet under the muffin tin to make cleanup a breeze.
Bacon-Wrapped Egg Muffins
Recipe courtesy of “Cookin’ Savvy”
Ingredients:
• 1 pound regular-sliced bacon (not thick-sliced)
• 10 eggs
• 1/2 cup shredded cheese
• 1/3 cup half-and-half or milk
• 1 tablespoon garlic pepper
• 1/3 cup chopped fresh or frozen spinach
Directions
Preheat oven to 400 F.
Using muffin tin, wrap bacon around inside of each muffin hole. In bowl, whisk eggs, cheese, half-and-half, garlic pepper and spinach. Pour into each hole, filling about halfway to avoid overflowing while cooking. Cook 40 minutes, or until eggs are golden.
Tips: Place muffin tin on cookie sheet lined with aluminum foil to catch grease and make cleanup easier. If you want bacon taste without lining muffin holes, mix fried bacon pieces into eggs.
Substitutions: Line each hole with hashbrowns then add egg mixture. Use broccoli instead of spinach, if desired.
Make Mom’s day extra special
(Family Features) Don’t let Mother’s Day pass by as just another day on the calendar. Make this year’s celebration a true ode to the moms in your life with some extra special touches at breakfast and beyond.
Whether she’s the culinary expert of the home or cooking is usually a team effort, make sure her morning is one of rest and relaxation while you handle kitchen duties from prep to cleanup. These cinnamon muffins offer a one-ingredient solution that take just 15 minutes to prepare.
Add flowers: Flowers are a timeless Mother’s Day gift for a reason. They provide pops of color on dining room tables, kitchen counters, end tables or even nightstands. Consider mom’s favorite spot in the house and place them within eyeshot for a frequent reminder of how much she’s appreciated.
Create a personalized card: Add a special final touch to an already memorable morning with a thoughtful card and handwritten message. Get the kiddos involved and create a card from scratch with construction paper, colored pencils, markers and more for a homemade gift she’ll cherish. If you didn’t fall from the artistic tree, don’t fret — a storebought card means all the same when paired with a heartfelt message that conveys your love.
Cinnamon muffins
Recipe courtesy of “Cookin’ Savvy”
Ingredients:
• 2 tubes (8-count each) cinnamon rolls
Directions
Preheat oven to 400 F.
Grease muffin tin or line with liners. Using kitchen shears, cut each cinnamon roll into pieces and place in muffin holes.
Bake about 15 minutes, or until golden. Let cool then add provided icing.
Tip: To make icing extra special, add 2 tablespoons creamer and mix well before icing muffins.
A Better-for-You Way to Begin the Day
(Family Features) Starting a journey toward better health and wellness can begin the same way you can (and should) start each day: with a nutritious breakfast. A morning meal loaded with nutrient-boosting flavor provides the foundation you need not only for the day at hand, but for a sustainable long-term eating plan, as well.
Consider this Sweet Potato Breakfast Bake as a budget-friendly way to feed your family with plenty of leftovers for days to follow. Full of eggs, bell peppers and turkey sausage, it’s a surefire crowd-pleaser that’s also loaded with shredded sweet potatoes. According to the American Diabetes Association, sweet potatoes are a “diabetes superfood” because they’re rich in vitamins, minerals, antioxidants and fiber, all of which are good for overall health and may help prevent disease.
Sweet Potato Breakfast Bake
Recipe courtesy of Tessa Nguyen, RD, LDN, on behalf of the North Carolina Sweetpotato Commission
Prep time: 10 minutes
Cook time: 15 minutes
Servings: 12
Ingredients:
• Nonstick cooking spray
• 1 cup sweetpotatoes, shredded
• 1/2 cup cooked turkey sausage crumbles or cooked turkey bacon
• 1/4 cup green onions, sliced
• 1/2 cup bell pepper, diced
• 9 eggs, beaten
• 1/2 cup cheddar cheese, shredded
• 1/2 teaspoon black pepper
Directions
Heat oven to 400 F. Spray 13-by-9-inch baking dish with nonstick cooking spray.
Evenly spread sweet potatoes, sausage or bacon, green onions and bell peppers in dish. Pour eggs carefully into baking dish. Sprinkle shredded cheese and black pepper over eggs.
Bake 15 minutes.
Slice into 12 pieces and serve hot.
Easy Easter eats
(Family Features) Even if Easter hosting duties fell on your plate this year and added one more thing to your holiday to-do list, that doesn’t mean it has to be difficult. After all, Easter is a time meant for fun and fellowship with the food just one part of the celebration.
Building the menu around simple, one-pan dishes can keep the focus where it needs to be: spending time and creating memories with family and friends. These dishes call for short lists of ingredients, many of which you may already have in your pantry, and simple preparation to create a full spread perfect for sharing with loved ones. Plus, using only one pan makes cleanup a breeze, so you can get back to the festivities quickly.
Blueberry crumble
Finish off your feast with an adaptable dessert like this blueberry crumble. Made using just five ingredients and ready in about an hour, you can swap the blueberry pie filling and yellow cake mix for any combination that suits your guests’ tastes like apple pie filling with spice cake or cherry pie filling with chocolate cake; the sky’s the limit when it comes to satisfying that sweet tooth.
Ingredients:
• 1 can blueberry pie filling
• 1 box yellow cake mix
• 1 bag (4 ounces) chopped pecans
• 1 stick butter, melted
• 1/4 cup oil
• whipped cream, for serving (optional)
• vanilla ice cream, for serving (optional)
Directions
Preheat oven to 350 F.
Spread pie filling on bottom of 9-by-11-inch pan. Sprinkle cake mix and pecans on top. Do not mix.
Drizzle melted butter and oil on top of cake mix and pecans. Do not mix. Lift pan and tilt from side to side until cake mix is completely covered in butter.
Bake 1 hour until golden brown and bubbly.
Serve with whipped cream or vanilla ice cream, if desired.
Get Creative with Easter Sweets
(Family Features) Holiday hams and deviled eggs may take center stage at Easter gatherings, but edible crafts offer a reminder of the magic of the season that’s found in moments spent together. Simple recipes that call for a dose of creativity are perfect ways to bring the kids to the kitchen, made even easier when all that work leads to sweet treats.
Children of virtually any age can relish in the joys of using cookie cutters and decorating Easter Sugar Cookies, all with a little supervision and short list of instructions. This version shows how to make the cookies and homemade icing so you can create any color you desire for maximum creativity.
Easter Sugar Cookies
Recipe courtesy of “Cookin’ Savvy”
Icing:
• 1/3 cup meringue powder
• 1/2 cup warm water, plus additional for thinning (optional), divided
• 3 tablespoons vanilla
• 1 bag (2 pounds) powdered sugar
• 2 tablespoons corn syrup
• assorted food coloring
Cookies:
• 2 sticks unsalted butter, at room temperature
• 1 cup sugar
• 1 egg
• 1 tablespoon vanilla
• 2 teaspoons baking powder
• 1 dash salt
• 3 cups all-purpose flour
To make icing:
Mix meringue powder, 1/2 cup warm water, vanilla, powdered sugar and corn syrup. Separate into bowls and add food coloring; mix with water, as needed, to thin for piping.
To make cookies:
Cream butter and sugar. Mix in egg, vanilla, baking powder and salt. Mix in flour 1 cup at a time to form dough. Roll dough out to 1/4-1/2-inch thickness.
Cut into shapes, place on baking sheet and freeze 10 minutes. Bake 8-12 minutes. Cool completely before icing.
Place icing in zip-top or piping bags and cut off tips. Put cookies on parchment paper. Trace outline first then fill in middle. Use toothpicks to smooth out.
Let dry 6 hours and finish decorating with different icing colors or edible markers.
Get Creative with Easter Sweets
(Family Features) While plastic eggs may have led to a decline in good, old-fashioned egg-dyeing, there are still fun ways to bring crafts back to Easter celebrations. Consider these Kids Krafty Easter Cake Pops, which call for little ones to help dip seasonal shapes in chocolate, use cake molds and more.
Remember, these delicious crafts don’t have to be perfect – having fun and making memories that last a lifetime are what make Easter truly special.
Kids Krafty Easter Cake Pops
Recipe courtesy of “Cookin’ Savvy”
Ingredients:
• 1 box cake mix
• 1 can frosting
• 1 bunny chocolate mold
• 1 cakesicle mold
• ice pop sticks
• 1 bag white chocolate chips or melting chips
• cake pop sticks
• 1 bag orange melting chips
• 2 tablespoons canola or coconut oil, divided
• 1 bag green melting chips
• pastel sprinkles
• 1 piece hard foam (optional)
• edible markers
Directions:
Bake cake according to package instructions and let cool completely.
Crumble cake and mix with 1/2 can frosting until dough forms. Add more frosting, if needed. Using small cookie scoop, form dough into balls and set aside. Place dough in bunny molds then pop out and set aside with balls. Place dough in cakesicle mold, insert ice pop stick in each slot and freeze 5-10 minutes.
Melt handful of white melting chips. Stick tip of each cake pop stick in chocolate then insert into every cake ball and bunny until each has one stick. Set aside to dry.
Remove cakesicles from freezer and pop out of molds. In bowl, melt orange melts then mix in 1 tablespoon oil and transfer to cup. Dip cakesicles and scrape off excess using rim of cup. Place on parchment paper to dry.
In bowl, melt green melts then place in zip-top or piping bag. Cut tip off bag, pipe carrot leaves onto piece of parchment paper and let dry.
Melt remaining white melts and mix in remaining oil. Transfer to cup and dip ball-shaped cake pops and bunnies then tap stick on edge of cup to remove excess.
Over separate bowl, sprinkle ball-shaped pops with pastel sprinkles. To keep ball shape, let dry by sticking in piece of hard foam. Bunnies can dry face side up on parchment paper. After bunnies are dry, use edible markers to make face and color in ears.
When carrots and leaves are dry, remelt orange melts and place in piping or zip-top bag. Cut off tip and drizzle orange over carrots. Add small line of orange on each ice pop stick and place leaves on each stick. Let dry.
Celebrate St. Pat’s with A Traditional Irish Dish
(Family Features) If St. Patrick’s Day inspires feelings of hearth and home rather than leprechauns and green beer, you can celebrate tradition with warm, filling recipes that harken back to Irish heritage.
Share a sweet way to complete the meal in style with Irish Apple Cake, a classic dessert to top off a filling celebration. This version is easy enough to prepare with a handful of everyday ingredients for the cake, a crumbly topping and homemade custard for the finishing touch.
Irish Apple Cake
Cake:
• 3 cups self-rising flour
• 1/2 tablespoon cinnamon
• 1/4 teaspoon cloves
• 1/4 teaspoon nutmeg
• 1/4 teaspoon ginger
• 1 stick butter, cubed
• 3/4 cup sugar
• 4 apples of choice, peeled and cubed
• 2 eggs
• 1 cup half-and-half
Topping:
• 1/2 stick butter
• 3/4 cup flour
• 1 cup brown sugar
Custard:
• 6 large egg yolks
• 6 tablespoons sugar
• 1 1/2 cups half-and-half
• 2 teaspoons vanilla
Directions:
Preheat oven to 375 F. Grease and flour 9-inch round springform pan.
To make cake: In large bowl, sift flour with cinnamon, cloves, nutmeg and ginger. Using fork, cut butter until mixture resembles crumbs. Add sugar and apples; mix well. Stir in eggs and half-and-half until mixture reaches thick, dough-like batter. Pour batter into prepared pan.
To make topping: In bowl, mix butter, flour and sugar to create crumbled mixture. Sprinkle on top of batter in pan. Bake 1 hour. Check with toothpick to make sure middle is completely done. If not, bake 5-10 minutes. Let cool on rack.
To make custard: Whisk egg yolks and sugar. In saucepan, bring half-and-half to boil. Add one spoonful half-and-half at a time to egg mixture, whisking while adding. Once whisked together, return to saucepan and stir over medium heat until thickened, about 4 minutes. Remove from heat and whisk in vanilla.
Serve custard over cake.
Celebrate St. Pat’s with A Traditional Irish Dish
(Family Features) If St. Patrick’s Day inspires feelings of hearth and home rather than leprechauns and green beer, you can celebrate tradition with warm, filling meals that harken back to Irish heritage. Soups and stews are certain to conjure up some nostalgia while soft, delicious cake is a perfect way to honor tradition regardless of your ancestry.
This Irish Sláinte Stew offers a warm welcome to guests with your own way of toasting to the holiday – Sláinte is “cheers” in Gaelic. This hearty meal is perfect for a crowd with traditional stew meat slow-cooked in a Dutch oven with beef broth, spices, carrots, potatoes, herbs and an Irish draught beer. Serve alongside crusty bread that’s ideal for soaking up each delicious drop.
If you’re looking for additional ways to honor tradition this St. Patrick’s Day, consider a few other cozy Irish dishes: boxty (potato pancakes, similar to latkes), boiled cabbage, Irish soda bread, shepherd’s pie, corned beef and cabbage, potato soup, Irish coffee, colcannon (mashed potatoes and greens), coddle (typically including pork sausage, potatoes and onions) or seafood chowder.
To find more ways to celebrate St. Patrick’s Day, visit Culinary.net.
Irish Sláinte Stew
• Oil, for drizzling
• 1 pound stew meat
• 1-2 pinches salt, plus additional to taste, divided
• 1-2 pinches pepper
• 3 tablespoons flour
• 48 ounces beef broth
• 1 cup carrots, diced
• 1 cup celery, diced
• 3cups potatoes, diced
• 1/2 onion, diced
• 2 tablespoons garlic pepper
• 1 tablespoon dried thyme
• 1/2 tablespoon dried rosemary
• 1 tablespoon dried chives
• 1 bottle Irish draught beer of choice
• crusty bread, for serving
Directions:
In Dutch oven over medium heat, drizzle oil and brown stew meat with salt and pepper. Sprinkle flour over meat.
Add beef broth, carrots, celery, potatoes, onion, garlic pepper, thyme, rosemary and chives. Add Irish draught beer.
Bring to boil, stirring, 5 minutes. Simmer 2 hours, stirring occasionally.
Serve with crusty bread.
Comfort classics with an authentic Mexican twist
Family Features) Soup is a wintertime staple thanks to its simplicity, and you can put a delicious spin on your next winter warmup with Mexican-inspired ingredients. Giving soup night a twist starts with Cacique Foods, one of the country’s top authentic Mexican food brands, that invites friends and family to share real moments while savoring authentic flavors.
This Smoky Chorizo and Chicken Pozole relies on the bold, hearty, spicy taste of Cacique’s Pork Chorizo combined with handcrafted Homestyle Salsa. Queso Fresco’s crumbly, creamy texture and milky, fresh flavor adds the perfect finishing touch, making this soup a perfect way to warm up weeknights with just the right amount of heat.
Smoky Chorizo and Chicken Pozole
Prep time: 5 minutes
Cook time: 30 minutes
Servings: 6-8
• 2 tablespoons olive oil
• 1 large white or yellow onion, finely chopped
• 1 teaspoon kosher salt, plus additional, to taste (optional)
• 1 package (9 ounces) Cacique Pork Chorizo
• 2 teaspoons smoked paprika
• 1 teaspoon dried Mexican oregano
• 1 container (16 ounces) Cacique Medium Homestyle Salsa
• 1quart chicken stock
• 2 pounds boneless, skinless chicken thighs or breasts, trimmed of excess fat and diced
• 1 can (25 ounces) white hominy, drained and rinsed
• 1 lime, cut into wedges
• 3/4 cup crumbled Cacique Ranchero Queso Fresco
• 1/2 cup chopped cilantro
Directions:
In large, heavy pot over medium heat, heat oil. Reserve 1/4 cup onion for garnish; add remaining onion to pot and season with salt. Saute until translucent, about 5 minutes.
Increase heat to medium-high; add pork chorizo and break it apart with spoon. Cook chorizo undisturbed until deeply browned and cooked through, 3-5 minutes. Add smoked paprika and oregano; cook 30 seconds, or until fragrant.
Pour in salsa and scrape up browned bits from bottom of pan. Bring to simmer 1-2 minutes, allowing it to thicken slightly then add stock and bring to simmer.
Stir in diced chicken and hominy. Decrease heat to medium and cook 8-10 minutes until chicken is cooked through. Taste and season with more salt, if necessary. Remove from heat.
Serve bowls of pozole with reserved onion, lime wedges, crumbled queso fresco and chopped cilantro.
Give comfort food classics a Mexican twist
(Family Features) If winter evenings have you stuck in a dinner rut, heat up the kitchen with family favorites everyone can look forward to. Shaking off the chill can start with a cozy blanket and comforting food that warms you from the inside out.
For a flavorful side that complements a variety of main courses while adding Mexican flair, consider Mexican loaded mashed potatoes. This recipe is a familiar favorite with the unique twist of bacon and pork chorizo for a meat-infused recipe that will become a menu mainstay.
Plus, for an extra creamy texture, it calls for cacique crema Mexicana — an everyday table cream with a neutral, fresh-tasting flavor ideal for balancing out spice — and Oaxaca, a semisoft cheese with a mellow, buttery flavor.
Mexican loaded mashed potatoes
Prep time: 35 minutes
Cook time: 40 minutes
Servings: 10
• 3 pounds russet potatoes (about 9 medium potatoes), peeled and cubed
water
• 6 bacon strips, chopped
• 1 package Cacique Pork Chorizo
• 12 ounces Cacique Crema Mexicana
• 1/2 cup butter, cubed
• 1 1/2 teaspoons onion powder
• 1 teaspoon salt
• 1teaspoon garlic powder
• 1/2 teaspoon pepper
• 1 cup Cacique Oaxaca or Queso Quesadilla, shredded
• 1/2 cup Cacique Crema Mexicana Agria, for topping (optional)
• 3 green onions, chopped
Directions:
In Dutch oven, add potatoes and cover with water. Bring to boil. Reduce heat; cook, uncovered, 10-15 minutes, or until tender.
In skillet over medium heat, cook bacon until crisp. Drain on paper towels, chop into small pieces and set aside. Remove bacon grease from skillet and cook chorizo over medium-high heat, 6-8 minutes.
Drain potatoes; add to pan. Mash potatoes, gradually adding crema Mexicana, butter, onion powder, salt, garlic powder and pepper. Transfer to greased 13-by-9-inch baking dish; sprinkle with cheese, chorizo and bacon. Refrigerate, covered, up to 1 day.
Preheat oven to 350 F. Remove potatoes from refrigerator and let stand while oven heats. Bake, covered, about 30 minutes. Uncover; bake 10 minutes, or until heated through.
Drizzle with crema Mexicana agria and chopped green onions.
A Valentine’s recipe you’ll love to share
(Family Features) If the way to your loved one’s heart is through the stomach, there’s no better way to start off this Valentine’s Day than with a homemade breakfast prepared with love.
Show your affection with a plate of these colorful Cocoa-Kissed Red Velvet Pancakes featuring rich 100 percent cocoa, buttermilk and fresh berries. Heart-shaped cookie cutters lend a special touch to these fluffy, flavorful pancakes. Add sweet garnishes like powdered sugar and berries for a sensational way to say, “I love you.”
Cocoa-Kissed Red Velvet Pancakes
Recipe courtesy of Nestlé
Servings: 10 pancakes
• 1 cup all-purpose flour
• 1/4 cup granulated sugar
• 3 tablespoons Nestlé Toll House Baking Cocoa
• 1 teaspoon baking powder
• 1/2 teaspoon baking soda
• 1/2 teaspoon salt
• 1 large egg
• 1 cup reduced-fat buttermilk or low-fat milk
• 2 tablespoons unsalted butter, melted
• 1 1/2 teaspoons vanilla extract
• 1 teaspoon red food coloring
• heart-shaped pancake cutters or cookie cutters (optional)
• butter, for garnish (optional)
• powdered sugar, for garnish (optional)
• maple syrup, for garnish (optional)
• fresh berries, for garnish (optional)
Directions:
In large bowl, combine flour, sugar, baking cocoa, baking powder, baking soda and salt; stir well.
In separate large bowl, whisk together egg, buttermilk, unsalted butter, vanilla extract and food coloring. Add to flour mixture; stir to combine. Allow mixture to sit 5 minutes.
Heat nonstick skillet or griddle over medium heat. Brush with oil or butter. Add about 1/4 cup batter to skillet. Cook about 2 minutes, or until bubbles start to form on top. Flip and cook 1-2 minutes, or until bottom is lightly browned. Serve immediately with butter, powdered sugar, syrup and berries, if desired.
Tip: If using pancake or cookie cutters, be sure to coat with oil so pancakes don’t stick. Place cutters in skillet and pour batter into cutters. Remove cutters before flipping.
A light but satisfying soup
(Family Features) On the lighter side when it comes to soup, but still satisfying, Tuscan 3 Bean Peasant Soup calls for shallots, diced tomatoes, spinach, cannellini beans, cooked small pasta and more for a true winter warmup. Served with toasted bread cubes, it’s sure to warm loved ones up from the inside out.
Its key ingredient is Aunt Nellie’s 3 Bean Salad, featuring premium green, wax and kidney beans in a light, sweet-tangy vinegar dressing. As a ready-to-eat solution, it can be served chilled, at room temperature or as part of comforting winter recipes.
Tuscan 3 Bean Peasant Soup
Recipe courtesy of Sarah Meuser on behalf of Aunt Nellie’s
Prep time: 20 minutes
Cook time: 27 minutes
Servings: 8
• 10 ounces day-old crusty bread, such as ciabatta, cut into 1-inch cubes
• 2 tablespoons extra-virgin olive oil, plus additional for drizzling (optional)
• 2 medium shallots or 1 small yellow onion, peeled and chopped
• 3 cloves garlic, peeled and chopped
• 1 can (15 1/2 ounces) cannellini beans, drained and rinsed
• 1 can (28 ounces) diced tomatoes
• 3 cans (14 1/2 ounces each) low-sodium chicken broth (about 6 cups)
• 1/2 teaspoon freshly ground black pepper
• 1/2 cup small pasta, such as ditalini, uncooked
• 2 cups frozen cut leaf spinach or chopped fresh spinach
• 2 jars (15 1/2 ounces each) Aunt Nellie’s 3 Bean Salad, drained
• 1 tablespoon lemon zest (optional)
Directions:
Preheat oven to 375 F. Place bread cubes in single layer on large baking pan. Bake until bread cubes are lightly browned, 8-12 minutes. Set aside.
Heat large saucepan or Dutch oven over medium heat. Add 2 tablespoons oil; swirl to coat. Add shallots; cook 5 minutes, or until soft, stirring occasionally. Add garlic; cook 1 minute, or until fragrant. Add cannellini beans, tomatoes, broth and black pepper; bring to boil. Add pasta; cook 8 minutes, or according to package directions. Stir in spinach and bean salad. Simmer 5 minutes, or until heated through.
Ladle soup evenly into bowls. Top with toasted bread cubes and lemon zest, if desired. Drizzle with additional olive oil, if desired.
Solve Winter Blues with Cozy Recipes
(Family Features) Cozying up with a bowl of warm deliciousness is a perfect way to ward off the chill of winter, and it’s made even better when shared with those you love. Turning to favorite chilis and soups with comforting ingredients and smoky spices can transport your family from snow and sleet to warmth and paradise.
Smoky German Potato, Sausage and Bacon Chili
Recipe courtesy of “Dad with a Pan” on behalf of READ
Prep time: 20 minutes
Cook time: 40 minutes
Servings: 8
• 4 strips thick bacon, cut into cubes
• 1 pound smoked sausage, sliced into 1-inch segments
• 1 small onion, diced
• 4 cloves garlic, minced
• 4 tablespoons chili powder
• 1 tablespoon ground coriander
• 1 tablespoon ground cumin
• 1 teaspoon ground cayenne pepper
• 1 teaspoon dried oregano
• 2 Fresno peppers, diced
• 1 can (14 1/2 ounces) diced tomatoes, drained
• 1 can READ German Potato Salad, drained
• 1 cup beef broth
• salt, to taste
• pepper, to taste
Directions:
In large saucepan over medium heat, cook bacon until crispy. Remove and set aside, leaving about 2 tablespoons drippings in saucepan.
Add smoked sausage and cook until browned.
Once sausage is cooked, add diced onion and minced garlic, cooking until onion is translucent.
Drain excess fat then stir in chili powder, coriander, cumin, cayenne pepper, oregano and Fresno peppers until well mixed.
Add drained diced tomatoes, German potato salad and cooked bacon to saucepan.
Add beef broth and stir to combine. Season with salt and pepper, to taste.
Bring mixture to simmer and let cook about 30 minutes, stirring occasionally, until flavors are melded.
Substitution:
Jalapenos can be used for Fresno peppers.
Quick, easy and nutritious meals
(Family Features) Making time for meals together can have a positive impact on the wellbeing of families, including children and adolescents. In fact, regular meals at home can help reduce stress and boost self-esteem, according to research published in “Canadian Family Physician.”
Making time for meals together shouldn’t require spending all night in the kitchen, however. A simple-to-prepare ingredient like eggs can help you spend less time cooking and more time with family.
Sweet Potato Hash with Eggs
Servings: 4 (1 cup per serving)
• 2 teaspoons canola or corn oil
• 1/2 medium onion, chopped
• 4 medium sweet potatoes, peeled and cut into 1/2-inch cubes
• 1/2 medium red or green bell pepper, chopped
• 2/3 cup fat-free, low-sodium vegetable broth
• 2 teaspoons minced garlic
• 2 teaspoons smoked paprika
• 1 teaspoon ground cumin
• 1/2 teaspoon dried thyme, crumbled
• 1/2 teaspoon coarsely ground pepper
• 1/8 teaspoon salt
• 4 large eggs
• hot pepper sauce (optional)
Directions:
In pressure cooker set on saute, heat oil. Cook onion 3 minutes, or until soft, stirring frequently. Turn off pressure cooker.
Stir in potatoes, bell pepper, broth, garlic, paprika, cumin, thyme, pepper and salt. Secure lid. Cook on high pressure 3 minutes. Quickly release pressure. Turn off pressure cooker.
Remove pressure cooker lid. Crack one egg into small bowl. Using back of spoon, make small well in potatoes. Slip egg into well. Repeat with remaining eggs, making separate well for each egg. Secure lid with pressure vent open. Saute 2 minutes. Let stand on “keep warm” setting 2 minutes, or until eggs are cooked to desired consistency.
Serve hash sprinkled with dash of hot pepper sauce, if desired.
Nutritional information per serving:
258 calories; 7.5 g total fat; 2 g saturated fat; 1.5 g polyunsaturated fat; 3 g monounsaturated fat; 186 mg cholesterol; 244 mg sodium; 39 g carbohydrates; 6 g fiber; 9 g total sugars; 10 g protein.
Family-Friendly Fun to Beat Winter Blahs
(Family Features) Making time for meals together shouldn’t require spending all night in the kitchen. A simple-to-prepare ingredient like eggs can help you spend less time cooking and more time with family.
Poached Egg Tostadas with Avocado-Tomatillo Salsa
Servings: 4 (1 egg and 1/2 cup salsa per serving)
• 2 Nonstick cooking spray
• 4 corn tortillas (6 inches each)
• 4 cups water
• 1 tablespoon white vinegar
• 4 large eggs
Salsa:
• 1 medium avocado, diced
• 1 medium Anaheim or poblano pepper, seeds and ribs discarded, diced
• 1 medium tomatillo, papery husk discarded, washed and diced
• 1/2 medium tomato, diced
• 1/4 cup diced red onion
• 1/4 cup chopped fresh cilantro
• 2 tablespoons fresh lime juice
• 1 medium garlic clove, minced
• 1/8 teaspoon salt
Directions:
Preheat oven to 400 F. Line baking sheet with aluminum foil. Lightly spray foil with nonstick cooking spray.
Arrange tortillas in single layer on foil. Lightly spray tortillas with nonstick cooking spray. Using fork, pierce tortillas to prevent from filling with air. Bake 5-6 minutes on each side, or until golden brown. Transfer to serving plates.
In large skillet over high heat, bring water and vinegar to boil.
Once water is boiling, reduce heat and simmer. Break egg into cup then carefully slip egg into simmering water. Repeat with remaining eggs, avoiding eggs touching in water. Simmer 3-5 minutes, or until egg whites are completely set and yolks are beginning to set but aren’t hard. Using slotted spoon, drain eggs. Place each egg on tostada.
To make salsa: In medium bowl, gently stir together avocado, pepper, tomatillo, tomato, red onion, cilantro, lime juice, garlic and salt. Serve with tostadas.
Family-Friendly Fun to Beat Winter Blahs
(Family Features) Cool winter days may have you tempted to burrow under a blanket and wait out the weather, but there are plenty of entertaining and affordable ways to enjoy quality family time together despite chilly temperatures.
Kids who are cooped up indoors during the winter often get restless, but you can make the most of that boredom by gathering everyone and discovering new ways to create memories together.
Cocoa Smiley Face Waffle
• 2 Cocoa PEBBLES waffles
• 1 cup Cocoa PEBBLES cereal
• 1 container whipped cream
• chocolate chips (optional)
• chocolate sprinkles (optional)
• strawberries (optional)
• chocolate syrup (optional)
Directions:
Heat waffles until golden brown and place on plate. Use whipped cream to make smiley face eyes, nose and mouth.
Place cereal on top of whipped cream to make eyes, nose and mouth colorful. Add chocolate chips, chocolate sprinkles, strawberries and chocolate syrup, if desired.
Fruity Smiley Face Waffle
• 2 Fruity PEBBLES Waffles
• 1 container whipped cream
• 1 cup Fruity PEBBLES cereal
• blueberries (optional)
• rainbow sprinkles (optional)
maple syrup (optional)
Directions:
Heat waffles until golden brown and place on plate. Use whipped cream to make smiley face eyes, nose and mouth.
Place cereal on top of whipped cream to make eyes, nose and mouth colorful. Add blueberries, rainbow sprinkles and syrup, if desired.
A Pop of Peppermint
(Family Features) While there are countless ingredients that harken to the taste of holidays past, there’s one sweet favorite that truly symbolizes the season: peppermint. Whether enjoyed in the familiar shape of a candy cane — the original kid-favorite — or added to recipes from beverages to desserts and everything in between, it’s a delicious way to connect generations.
For example, White Chocolate Peppermint Popcorn Bark offers a tasty way for everyone to get in on the fun. The taste of peppermint and white chocolate make this a perfect holiday treat for sharing with a crowd. Plus, the easy prep means less time in the kitchen and more time savoring the classic flavors.
Better yet, it makes for a delicious gift to send off with guests as another festive celebration comes to a close. Simply package in a small, clear bag tied off with a colorful bow so loved ones can enjoy the tastes of the season in the days to follow.
These favorites are made possible by the versatility of popcorn, one of America’s most beloved snack foods. Celebrated for its seed-to-snack simplicity, popcorn’s smell, taste and versatility mean it can enhance any occasion as a budget-friendly solution for family gatherings.
White Chocolate Peppermint Popcorn Bark
Yield: 1 pound
• 5 cups popped popcorn
• 12 ounces white chocolate baking chips, chopped white chocolate or white candy coating
• 1 cup crushed hard candy peppermints
Directions:
Cover baking pan with foil or wax paper; set aside.
Place popcorn in large bowl; set aside.
In double boiler over barely simmering water, melt chocolate, stirring until smooth, or melt according to package directions. Stir in crushed peppermints.
Pour chocolate mixture over popcorn mixture and stir to coat. Spread onto prepared pan; cool completely.
When chocolate is cooled and set, break into chunks for serving.
Store in airtight container at room temperature.
Sweet and savory way to shake up holiday celebrations
(Family Features) Among the many enchanting elements of the holiday season, the family traditions and familiar flavors of favorite foods enjoyed year after year bring loved ones together better than perhaps any other occasion. From decorating wreaths and trees to crafting ornaments and preparing classic recipes, it’s a season of cherishing memories and creating new ones.
While there are countless ingredients that harken to the taste of holidays past, there’s one sweet favorite that truly symbolizes the season: peppermint. Whether enjoyed in the familiar shape of a candy cane — the original kid-favorite — or added to recipes from beverages to desserts and everything in between, it’s a delicious way to connect generations.
For example, these Jingle Balls provide a perfect kid-friendly project to keep them busy rolling popcorn balls in sparkling colored sugar for bite-size bits of holiday magic. They’re equal parts holiday spirit and sweet appetizer, snack or dessert. Just be sure to have an adult melt together the butter, marshmallows and peppermint extract before letting little ones show off their creativity.
This favorite is made possible by the versatility of popcorn, one of America’s most beloved snack foods. Celebrated for its seed-to-snack simplicity, popcorn’s smell, taste and versatility mean it can enhance any occasion as a budget-friendly solution for family gatherings.
Jingle Balls
Recipe courtesy of the American Pecan Promotion Board
Cook time: 24 minutes
Servings: 8
• Nonstick cooking spray
• 12 cups popped popcorn
• 6 tablespoons butter or margarine
• 3 cups mini marshmallows
• 1/2 teaspoon peppermint extract
• assorted colored sugars
Directions:
Lightly spray large mixing bowl with nonstick cooking spray. Add popcorn.
Spread plastic wrap on cookie sheet; set aside.
In medium saucepan, melt butter and marshmallows; stir until mixture is smooth. Stir in peppermint extract. Pour over popcorn, mixing until well coated. Let cool 2 minutes.
Spray hands with cooking spray and form popcorn mixture into 3-inch balls. Gently press colored sugar onto balls. Let sit on prepared cookie sheet until cool and set.
Sweet and savory way to shake up holiday celebrations
(Family Features) ’Tis the season for sweet and savory favorites – from the mouthwatering desserts you crave each year to starters and snacks that hold over hungry guests. Elevate your holiday entertaining with the right combination of appetizers, main courses, sides, sweets and beyond that start with the same seasonal staple: pecans.
To help celebrate the holiday season, the American Pecan Promotion Board introduced a digital Pe-Calendar to highlight the many ways pecans can be enjoyed in and beyond a traditional pie. From Dec. 7-18, the interactive calendar will unveil tasty recipes for pecan fans to enjoy, along with fun games that can enter you in to win exciting prizes each day. From delicious Baked Brie with Pecans and Cranberry Orange Chutney to nutritious Pecan Snack Mix with Cranberries and Chocolate, along with prizes, the calendar provides an ultimate way to shell-ebrate with the must-have holiday nut.
Baked Brie with Pecans and Cranberry Orange Chutney
Recipe courtesy of the American Pecan Promotion Board
Cook time: 24 minutes
Servings: 8
• 1 bag (12 ounces) fresh cranberries
• 1/2 cup maple syrup, plus 1 teaspoon for garnish, divided
• 1/2 cup water
• 1 orange, zest and juice only
• 1 teaspoon freshly chopped thyme, plus additional for garnish, divided
• 1 teaspoon freshly chopped rosemary
• 1 tablespoon bourbon (optional)
• 1 round brie (13.4 ounces)
• 1/2 cup roasted pecan pieces
• crackers
• toasted bread
• apple slices
Directions:
Preheat oven to 350 F. Line baking sheet with parchment paper or silicone baking mat.
In medium saucepan over medium-high heat, bring cranberries (reserving some for garnish), 1/2 cup maple syrup and water to boil. Reduce heat to medium-low and cook, stirring occasionally, until cranberries pop and mixture thickens, 8-10 minutes.
Remove cranberry mixture from heat and stir in orange zest, orange juice, 1 teaspoon thyme, rosemary and bourbon, if desired.
Place brie on parchment-lined baking sheet. Bake 5-7 minutes, or until inside of cheese softens while outside remains intact.
Transfer brie to serving platter and top with chutney and toasted pecans. Drizzle remaining maple syrup over brie and garnish with remaining fresh thyme and reserved cranberries. Serve with crackers, toasted bread and apple slices.